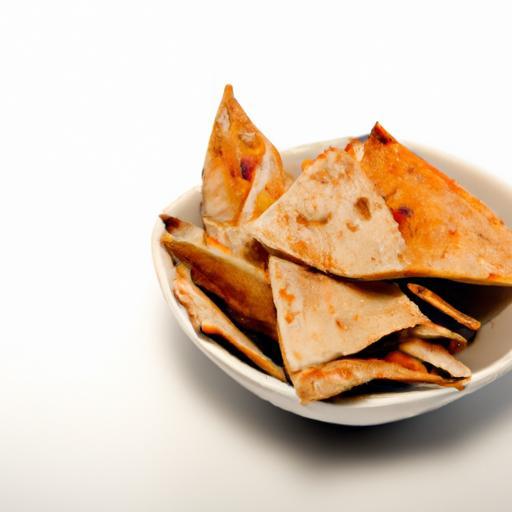
there’s something undeniably satisfying about the crisp snap of a perfectly toasted pita chip-golden, crunchy, and just begging to be dipped, scattered over salads, or savored on their own. While store-bought versions are plentiful, nothing quite compares to the fresh, warm, and customizable delight of homemade pita chips. In this guide, we’ll unlock the secrets to transforming humble pita bread into irresistibly crunchy delights, exploring everything from seasoning magic to baking tips.Whether you crave a simple sea salt sprinkle or an adventurous blend of herbs and spices, get ready to elevate your snacking game with homemade pita chips that are as rewarding to make as thay are to munch.
Selecting the Ideal Bread for Crispy Pita Chips
Crunchy Delight: Your Guide to Perfect Homemade Pita Chips begins with the essential choice of bread, a decision that shapes every crispy bite. For this snack, opting for traditional pita bread with a sturdy yet tender crumb ensures chips that crisp up beautifully without crumbling.Look for pita varieties that are slightly thick, not overly fluffy, as these hold up better during slicing and baking.
Whole wheat and multigrain pitas add a nutty flavor and extra texture, ideal for those seeking a wholesome twist. Additionally, pita pockets are your best friend-splitting them before cutting slices creates naturally perfect chip sizes. Avoid ultra-thin or soft flatbreads that tend to burn rather than crisp.
Mastering the Art of Seasoning for Flavorful Crunch
Seasoning transforms humble pita chips into an irresistible snack. Start with a light brush of extra virgin olive oil, which promotes even browning and carries your spices flawlessly. To craft a harmonious balance of flavors, combine garlic powder, smoked paprika, ground cumin, and sea salt. These spices awaken the palate with warm, smoky, and savory notes.
Feel adventurous? Sprinkle flaked chili for fire,sumac for tang,or a subtle dusting of nutritional yeast for a cheesy umami punch. Gently toss the pita triangles in your spice mix to ensure every corner is enveloped in flavor. Remember, the seasoning is where you can personalize your crunchy delight.
Baking Techniques That Guarantee Perfect Texture
Perfect pita chips rely on low-and-slow baking complemented by strategic turning. Preheat your oven to around 350°F (175°C) to ensure an even crisp without burning. After seasoning, arrange pita chips in a single layer on a parchment-lined baking sheet, giving each piece room to breathe.
Bake for about 12 to 15 minutes, flipping halfway to golden perfection. Watch closely in the last few minutes-chips should snap when bent and have a uniform golden hue. To lock in crispiness, allow chips to cool on a wire rack; this prevents steam buildup and sogginess.
Creative Serving Ideas to Elevate Your Homemade Snack
Once your crispy chips are ready, the real fun begins. Pair them with vibrant dips like classic hummus, roasted red pepper dip, or creamy tzatziki for Mediterranean flair. For a playful twist, serve with guacamole topped with pomegranate seeds or a zesty beetroot and yogurt spread.
Elevate presentation by arranging pita chips in a rustic wooden bowl garnished with fresh chopped parsley, lemon zest, or toasted sesame seeds. Use colorful dipping bowls or layer chips in a mason jar for casual entertaining. This snack shines as a party starter,game-time favorite,or an anytime crunchy craving cured beautifully.
Prep and Cook Time
- Prep Time: 10 minutes
- Cook Time: 15 minutes
- Total Time: 25 minutes
Yield
Approximately 4 servings (about 3 cups of pita chips)
Difficulty Level
Easy
ingredients
- 4 large pita bread pockets (preferably whole wheat or classic white)
- 3 tbsp extra virgin olive oil
- 1 tsp garlic powder
- 1 tsp smoked paprika
- 1/2 tsp ground cumin
- 1 tsp sea salt (adjust to taste)
- Optional: pinch of crushed red pepper flakes or nutritional yeast
Instructions
- preheat oven to 350°F (175°C).Line a baking sheet with parchment paper for easy cleanup.
- Cut each pita pocket in half, then slice each half into 8 equal triangles. Carefully separate the two layers of each triangular piece, if you prefer thinner chips, or keep them intact for crunchier chips.
- In a large bowl, whisk together olive oil, garlic powder, smoked paprika, cumin, sea salt, and optional spices.
- Toss pita triangles in the seasoned oil mixture,making sure each piece is evenly coated but not soggy.
- Arrange pita chips in a single layer on the prepared baking sheet. Avoid overlapping to promote even baking.
- Bake for 7 minutes, then flip each chip gently and bake for another 5-8 minutes, or until golden and crisp. Keep a close eye after the 12-minute mark to prevent burning.
- Remove from oven and transfer chips to a wire rack to cool wholly. This step is crucial for maintaining crunch.
- Serve chips immediately or store in an airtight container for up to 3 days.
tips for Success
- Choose fresh pita bread-stale pita chips won’t crisp as well.
- Use room temperature olive oil for better adherence to chips.
- Don’t overcrowd the baking sheet; this leads to steaming instead of crisping.
- make-ahead option: Bake chips and store in an airtight jar for a crunchy snack ready in minutes.
- For gluten-free alternatives, consider pita-style gluten-free bread but adjust baking times carefully.
Serving Suggestions
- Serve alongside bowls of roasted garlic hummus or creamy tzatziki for dipping.
- Garnish with fresh herbs like parsley or cilantro and a drizzle of lemon juice to brighten flavors.
- Create a Mediterranean snack board with olives, feta, and cherry tomatoes for a colorful, shareable spread.
- Sprinkle with toasted sesame seeds or za’atar spice before baking for a gourmet finish.
| Nutrient | Per Serving |
|---|---|
| Calories | 150 |
| Protein | 4g |
| Carbohydrates | 18g |
| Fat | 7g |

For even more Mediterranean-inspired snacks and ideas to pair with your pita chips, explore our Mediterranean Meze Ideas. For complete nutritional details on pita bread varieties, visit the USDA Food Database.
Q&A
Q&A: Crunchy Delight – Your Guide to Perfect Homemade Pita Chips
Q1: What makes homemade pita chips better than store-bought ones?
Homemade pita chips offer unbeatable freshness and flavor. You control the seasoning, the crispness, and the oil quality, resulting in a snack that is tailor-made for your taste buds. Plus, they’re free from unwanted preservatives and artificial additives commonly found in commercial brands.
Q2: Which type of pita bread is best for making chips?
Opt for fresh or day-old pocketless pita bread, which tends to crisp more evenly.Whole wheat pita offers a nuttier flavor while white pita provides a classic, mild base. Either way, the key is thickness-thinner pitas bake into more delicate chips, while thicker ones give a hearty crunch.
Q3: How do I ensure my pita chips come out perfectly crunchy, not soggy?
The secret lies in drying out the pita before baking. Cut the pita into evenly sized triangles, brush lightly with olive oil, and sprinkle with salt or your favorite seasonings.Bake on a single layer at a moderate temperature (around 375°F / 190°C). Flip halfway through to crisp both sides evenly and avoid overcrowding the pan-this allows steam to escape instead of softening the chips.
Q4: What are some flavorful seasoning ideas for homemade pita chips?
Think beyond simple salt and pepper! Try garlic powder with smoked paprika for a smoky punch, za’atar for a Middle eastern twist, or a sprinkle of nutritional yeast for a cheesy, umami boost. for something zesty,a dash of lemon zest combined with sea salt adds vibrant freshness.
Q5: Can pita chips be made gluten-free?
Absolutely! Use gluten-free pita bread available in specialty or health food stores. As always, check that your seasonings and oils are gluten-free to avoid any unwanted surprises.
Q6: How should I store homemade pita chips to keep them fresh and crunchy?
Once fully cooled, store pita chips in an airtight container at room temperature. They generally stay fresh for up to a week. Avoid refrigerating, as moisture can make them lose their crunch.
Q7: What are some creative ways to enjoy homemade pita chips?
Beyond dipping in classic hummus or baba ganoush, pita chips make a crunchy topping for salads, soups, or Mediterranean bowls. Crumble them over a creamy avocado spread or use them to scoop up zesty tomato salsa or yogurt-based dips.
Q8: Is it possible to bake pita chips without oil?
Yes! For a lighter option, simply bake the pita triangles at a slightly lower temperature and a bit longer to dry out fully. They won’t have the same richness but will still offer satisfying crunch-perfect for those watching their fat intake.
Q9: What kitchen tools do I need to make pita chips at home?
Just a sharp knife or pizza cutter to slice the pita, a baking sheet, and optionally a pastry brush for olive oil. A wire rack can definitely help with even baking if you want extra airflow. Simple tools, simple steps, delicious results!
Q10: Can I experiment with sweet versions of pita chips?
Definitely! Instead of savory spices, brush pita pieces lightly with melted coconut oil, then sprinkle cinnamon and a touch of brown sugar before baking. These sweet pita chips pair beautifully with fruit dips or creamy desserts.
With these handy FAQs, your journey to creating perfect, crispy, and flavorful homemade pita chips is well within reach. Get ready to crunch your way to snacktime bliss!
Wrapping Up
With your newfound know-how, turning humble pita bread into golden, crunchy delights has never been easier-or more rewarding. Whether you’re dipping, snacking, or topping, these homemade pita chips bring a perfect crunch and a personal touch to every bite. So, next time you crave a snack that’s both simple and sensational, remember: the perfect pita chip is just a few easy steps away. Happy crunching!